How To Clean A Faucet Aerator (With Step-by-Step Video!)
It’s time to learn how to clean a faucet aerator if you’re experiencing poor water pressure if a particular faucet is spraying more than it’s flowing.
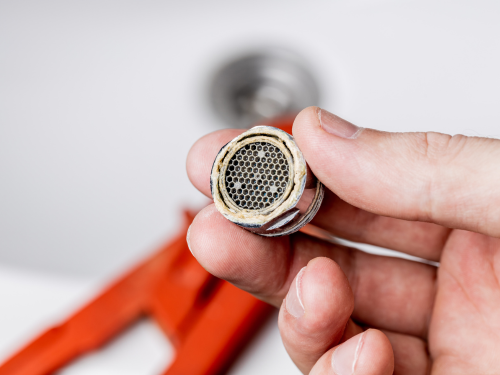
The screen housed in the tip of your faucet is called an aerator. Every now and then, debris (like scale and other types of buildup) breaks off in your pipes and ends up clogging a faucet’s aerator. It can’t get through the screen but impedes the flow of water.
Here’s What You’ll Need to Clean a Faucet Aerator
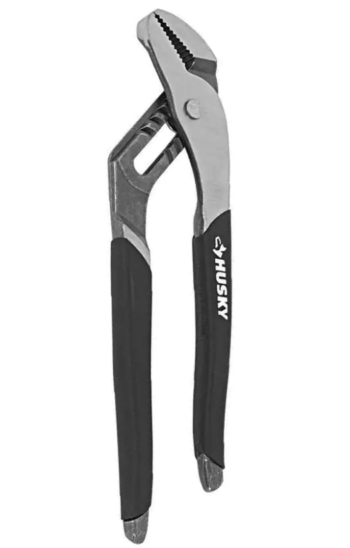
All you’re going to need is masking tape, a towel, a pair of groove-joint pliers (also called tongue-in-groove or channel lock pliers), and a towel. You might not need them, but a pair of needle-nose pliers and a paper clip might also come in handy.
How to Clean a Faucet Aerator in 5 Steps
Follow these steps, or watch the short video below, and you’ll have learned how to clean a faucet aerator in about 10 minutes. That’s also about how long it takes to do the job. So this one is super quick and easy.
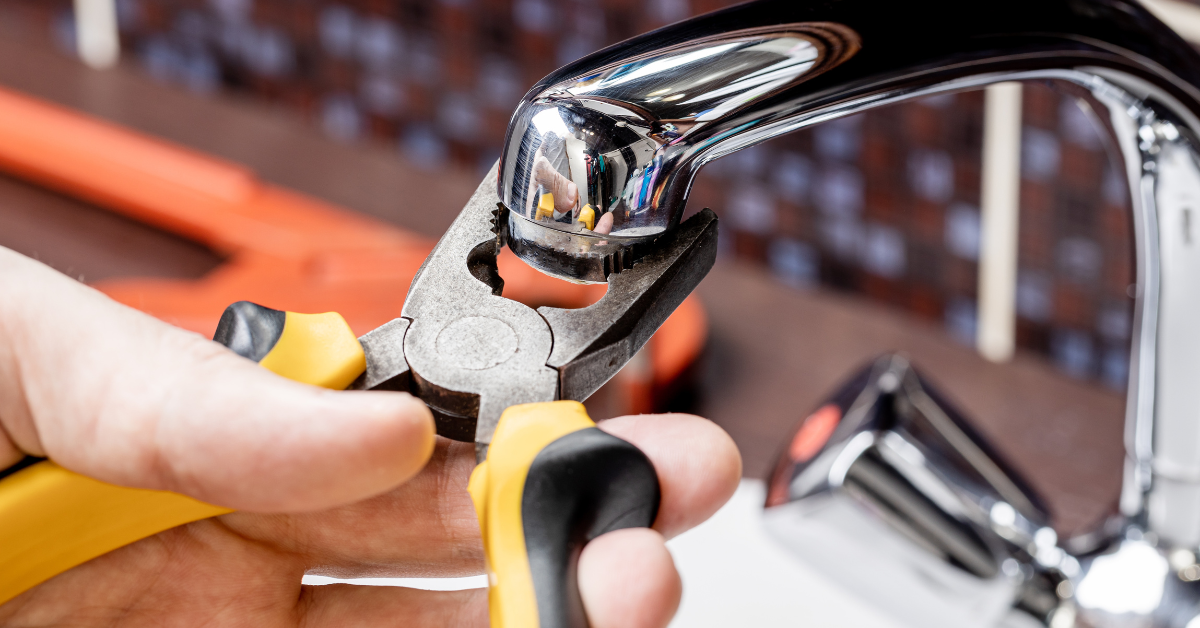
- Wrap Your Groove-Joint Pliers
Start by wrapping your masking tape around the grooves of your pliers. This will keep the hard metal grooves from biting into the body (or housing) of the faucet aerator and leaving marks.
- Unscrew Aerator Housing
Using those same pliers, grip the protected aerator body and unscrew it counterclockwise.
- Disassemble Aerator Parts
Take out all the parts of the aerator and lay them on your cloth (away from the drain…you don’t want to lose them). The aerator often includes a washer, perforated disk, a screen (the actual aerator), and the aerator body which all these pieces go into.
- Clean Your Aerator Parts
If there are mineral deposits on the disk or screen, you can try brushing them off or picking them out (using the needle-nose pliers, your fingers, or a paper clip). Or simply rinse them off to free them of debris. If the problem isn’t loose debris, it’s probably a buildup of scale. In that case, place the pieces into a glass of vinegar overnight. Rinse them off the next and they’ll be good as new.
- Reassemble the Aerator
Now all you need to do is put all the parts back together and screw the entire assembly back on (clockwise). Before screwing back on, remember to protect the surface of your faucet housing by placing masking tape on the grooves of your pliers.
Final Thoughts
This small plumbing project requires no experience and will have your faucets flowing smoothly once again. No more spraying water around your sink! The best news? It should only take about 10-20 minutes of your time. It’s a great job for beginners and DIYers.
Related Resources
- Common faucet repairs you can do yourself
- What are stem faucets (and how to identify them)?
- Leaky faucet troubleshooting guide
- Why is my faucet leaking (5 real possibilities)
- How to use plumber’s (Teflon) tape
- Sealing a leaky faucet baseplate
- How to unclog a kitchen sink sprayer
- Everything you need to know about kitchen sink plumbing
- How much does it cost to install a sink faucet?
- Tips on choosing a new faucet (with checklist)
Call 1-Tom-Plumber
Don’t hesitate to contact us here or call us at 1-Tom-Plumber (1-866-758-6237) if you need help repairing, replacing, or installing a faucet.
1-Tom-Plumber’s certified team of plumbers and drain technicians respond immediately to any emergency plumbing, drain cleaning, or water damage problem. We also handle the excavation of underground water lines and sewer main lines. Our immediate-response team is available every day and night of the year, even on holidays.