Common Faucet Repairs You Can Do Yourself (Save Money!)
Faucet repairs are quite common because they’re workhorses. It’s a miracle they down break down sooner after being turned on and off so often.
Below are 3 common jobs you need to handle in any stem-type (2-handles) faucet repairs. Our step-by-step process will help you accomplish each task in 30 minutes or less! Each job below is a building block for the next job, so you’re going to learn a lot.
Geting Started: Common Faucet Repairs
To learn more about the common types of stem faucets, read our post listed below in the Related Resources section. We’re going to focus on 4 repairs to stem faucets.
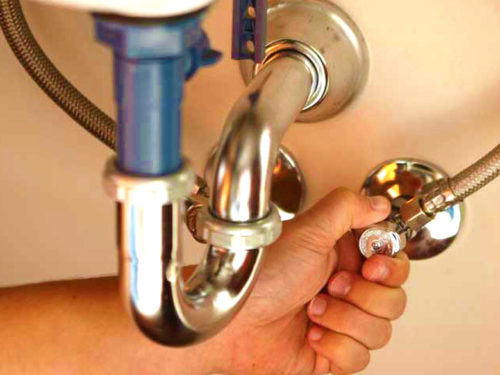
The first step in replacing the inner workings of a stem faucet is to shut off the water supply at the nearest stop valve. In fact, this should always be your first step when working on faucets.
You’ll also want to make sure you keep any removed parts so you can replace them with the proper new part. Most hardware stores and any plumbing supply center will have the replacement parts you need. If you can’t do this, at least find the brand name.
Pulling Out Handles & Stems
This particular job will take about 15 minutes unless the parts get stuck. No special skills are required, and you will need a screwdriver, tongue-and-groove pliers, and possibly a handle puller.
1. Remove Cap & Screw
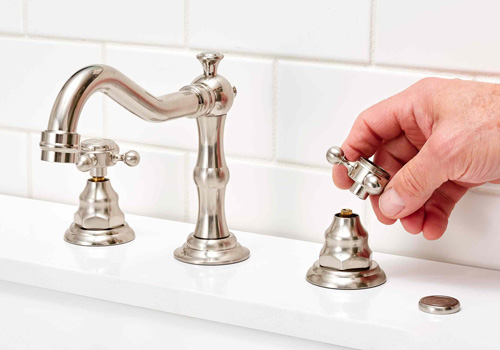
- If the handle is round, it is probably connected to the stem with a screw from the top. You might have to pry off the cap (usually marked “H” or “C”) to get to it.
- Same handles are attached with set screws — remove the set screw with an allen wrench (also called a Hex wrench) and pull of the handle.
2. Pull Out the Handle & Stem
- Usually, the handle will come out if you pull it up firmly or pry it up with a screwdriver. Take care not to mar the finish.
- Use a handle puller, a tool that flips the handle from underneath and draws the handle off the stem. This tool will make the job much easier if it is stuck.
- Once the handle is off, unscreew the stem with wrench or pliers.
Replacing Seat Washers
This portion of a stem faucet repair job will take about 30 minutes, plus a trip to the plumbing supply center if you don’t have a replacement washer on hand. You don’t need any plumbing skills but a screwdriver will come in handy.
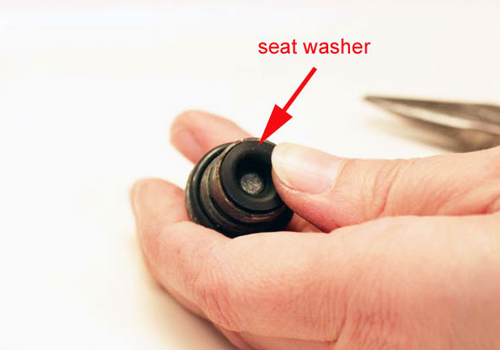
The washers in seat-and-washer stem faucets often become worn. Most often, there is a depression running in a ring around the washer, or the washer has begun to crumble with old age. If the washers wear out quickly, the seat is probably damaged and nicking the washer when you shut the water off. This causes the faucet to drip.
1. Remove the Old Washer
- Remove the washer screw and pull off the old washer if it is damaged in any way.
- Clean away any debris or deposits from the bottom of the stem.
- Take the stem and old washer to the store with you.
2. Insert a New Washer
- Find a washer the exact same size and shape as the old one (preferrably the same brand).
- If the old washer is deformed, this might be difficult to determine, so slip the new washer onto the bottom of the stem to double-check it.
- The right fit should be snug.
- Replace and tighten the screw and reinstall the stem.
Repairing Leaks Around Handles
Another common job in faucet repairs is fixing the leaks around a handle. This job takes about 15 minutes (to repack the spindle and replace the O-ring). No tools or special skills are needed.
If the faucet leaks around the handle, you’ll need to remove the stem to get at the source of the problem.
The spindles of older faucets have “packing” (a string-like material) that winds around the top to keep water from seeping out. The packing material is inside the “packing nut.” Don’t be put off by this old-fashioned material; it is easy to replace, and new packing lasts for years.
Newer stems have O-rings. Once you get the stem out, inspect the rest of the faucet and replace any parts that look as if they’re starting to wear.
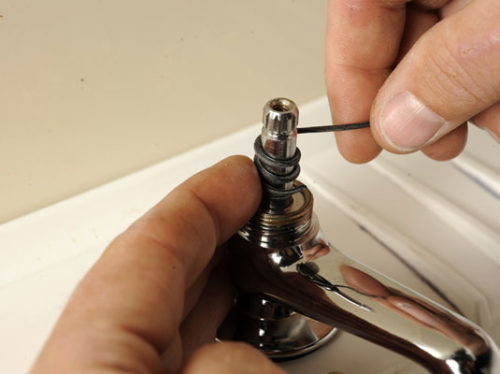
1. Wrap New Packing String
- If your faucet has packing wound around the spindle just under the packing nut, remove all of it and clean the spindle.
- Choose either plumber’s tape or strand packing and wind it fairly tight.
- Leave room around the packing material to screw on the packing nut (when the stem is replaced).
2. Replace the O-Ring
- New stems utilize an O-ring instead of packing.
- Simply remove the old O-ring and replace it with one that fits exactly.
- Lightly lubricate the O-ring with heatproof grease after you install it and before you reinstall the stem.
Final Thoughts
Because these jobs are like building blocks, the first faucet repair helps you get to the second repair. And the second helps you with the third project. Doing this project one at a time will give you a better understanding of the entire process for faucet repairs.
Related Resources
- What are stem faucets (and how to identify them)?
- 3 ways to fix a faucet leaking from its stem
- How to replace a single-handle shower cartridge
- 2-handle shower faucet replacement
- Removing a Moen bathroom faucet handle and stem
- Sealing a leaky faucet baseplate
- Is your ceramic disc faucet leaking?
- Leaky faucet troubleshooting guide
- Why is my faucet leaking (5 real possibilities)
- How to use plumber’s (Teflon) tape
- How to clean a faucet aerator (with video!)
Call 1-Tom-Plumber
Don’t hesitate to contact us here or call us at 1-Tom-Plumber (1-866-758-6237) if you would like help with faucet repairs of any kind.
1-Tom-Plumber’s certified team of plumbers and drain technicians respond immediately to any emergency plumbing, drain cleaning, or water damage problem. We also handle the excavation of underground water lines and sewer main lines. Our immediate-response team is available every day and night of the year, even on holidays.

