8 Common Reasons Your Toilet Is Leaking + DIY Fixes!
Introduction
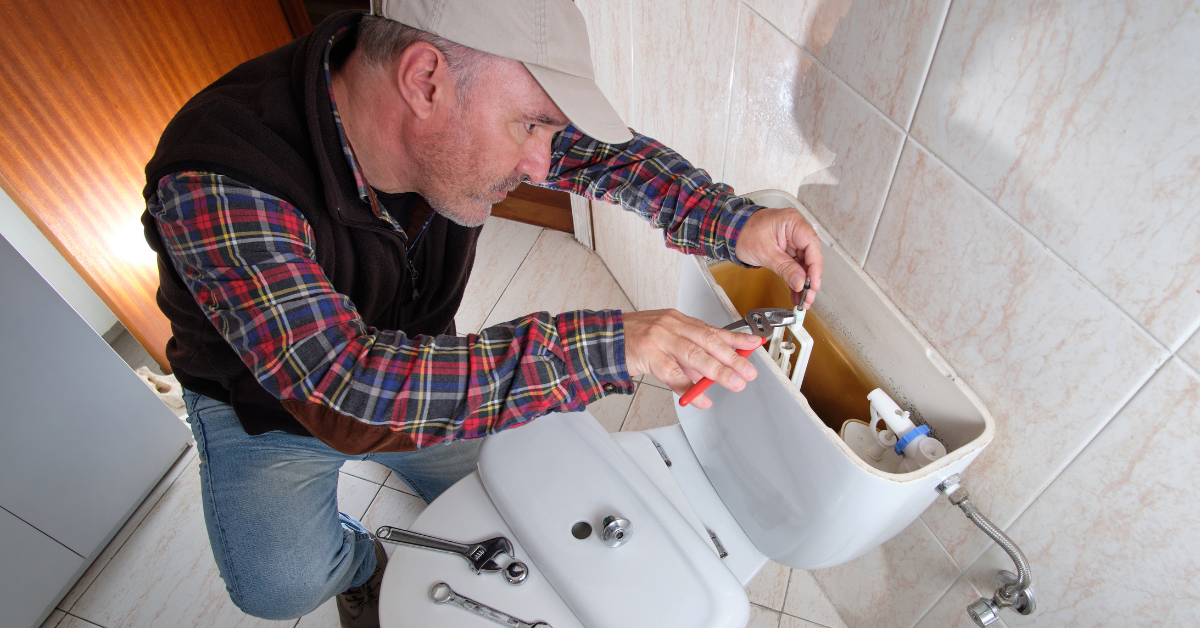
Is there a mysterious puddle of water around your toilet? Perhaps you hear the sound of water constantly running or dripping? These symptoms suggest your toilet is leaking. A leaky toilet can waste a significant amount of water, hiking up your utility bills and potentially damaging your bathroom flooring. Fortunately, many common toilet leaks are simple to diagnose and fix yourself. This guide will walk you through the eight most common reasons your toilet may be leaking and provide step-by-step DIY solutions to fix these issues quickly and efficiently.
Leak Cause #1: Worn Out Flapper Valve
One of the most frequent culprits behind a leaking toilet is a worn-out flapper. The flapper is a rubber valve that seals the flush valve opening at the bottom of the tank. When it deteriorates, it allows water to escape from the tank into the bowl continuously.
DIY Fix:
- Step 1: Shut off the water supply to your toilet to prevent any flow of water during the repair.
- Step 2: Next, flush the toilet to completely drain the tank, which will make it easier to access the components inside.
- Step 3: Then, carefully unhook the old flapper from the tank’s overflow tube and lift it off the flush valve seat, ensuring it doesn’t damage any surrounding parts.
- Step 4: After removing the old flapper, take it to the hardware store to find an exact replacement. This ensures that the new flapper will fit perfectly and function as expected.
- Step 5: Following that, attach the new flapper by hooking it over the ears of the valve seat, making sure it’s securely in place.
- Step 6: Reconnect the chain with minimal slack to allow for effective flushing without overextending the flapper.
- Step 7: Finally, turn on the water supply and test the flush several times to ensure that the new flapper is functioning correctly and the leak has stopped.
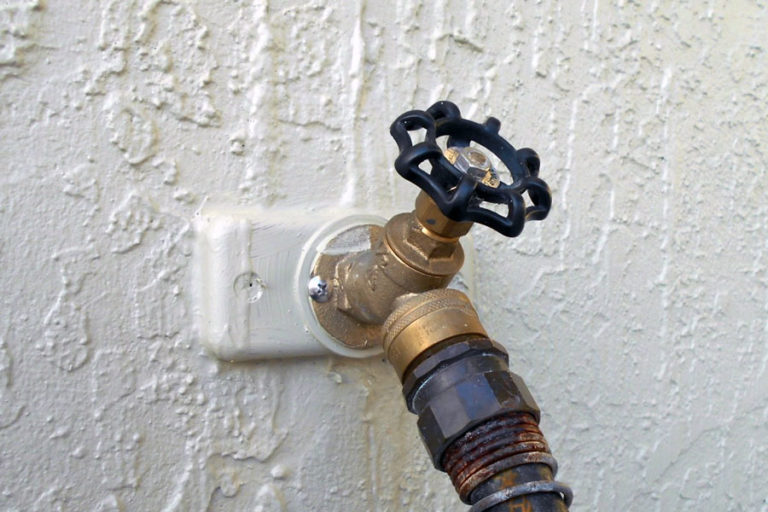
Leak Cause #2: Faulty Water Supply Line
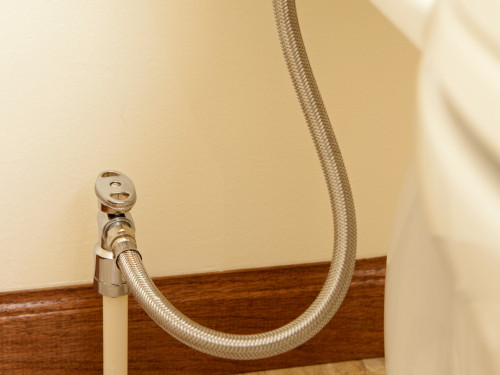
The line that supplies water to your toilet tank might be leaking. This can occur if the line is loose or the line itself has deteriorated.
DIY Fix:
- Step 1: Begin by inspecting the connection points both between the supply line and the tank and between the supply line and the shut-off valve. Use a wrench to tighten any connections that feel loose, ensuring everything is snug to prevent water from escaping.
- Step 2: Next, if you notice any damage to the line such as cracks or severe wear, replace it with a new stainless steel water supply line. Opting for stainless steel enhances durability and reliability, safeguarding against future problems.
- Step 3: After securing all connections, turn the water back on to test the system. Watch carefully for any signs of leakage at the connections. Confirming no water escapes ensures that your installation is successful and leak-free.
Leak Cause #3: Aging Tank Bolts
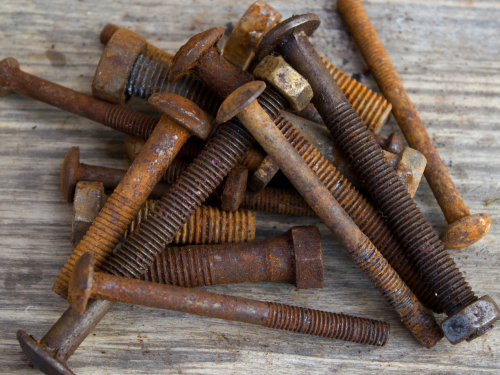
The bolts that connect the toilet tank to the bowl can corrode or the washers can fail, leading to leaks between the tank and the bowl.
DIY Fix:
- Step 1: First, turn off the water supply and flush the toilet to completely drain the tank, setting the stage for a mess-free repair.
- Step 2: Next, using a wrench, unscrew the nuts that secure the tank to the bowl. This will allow you to lift the tank off the bowl for better access to the internal components.
- Step 3: Then, remove the old bolts and washers from the tank. It’s essential to take care and ensure all parts are accounted for to avoid any loose components during reassembly.
- Step 4: After that, replace the old hardware with new stainless steel bolts and rubber washers. This upgrade is crucial for creating a watertight seal and preventing future leaks.
- Step 5: Reassemble the tank and bowl by reversing the disassembly steps. Ensure everything is aligned properly to avoid misplacing the new bolts and washers.
- Step 6: Finally, turn on the water supply and conduct several flush tests to confirm there are no leaks. This step is vital to ensure the integrity of your repairs.
Leak Cause #4: Cracked Porcelain
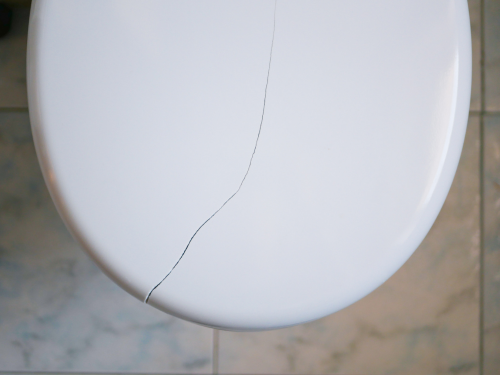
A crack in the tank or bowl of your toilet can lead to a significant leak. If you find a crack, it’s usually best to replace the toilet or the affected part if it’s severe.
DIY Fix:
- Temporary Fix: Clean the area around the crack thoroughly and apply waterproof silicone or plumbing epoxy as a temporary solution.
- Note: This fix is temporary; plan to replace the toilet or the cracked part soon to avoid future problems.
Leak Cause #5: Worn Out Wax Seal
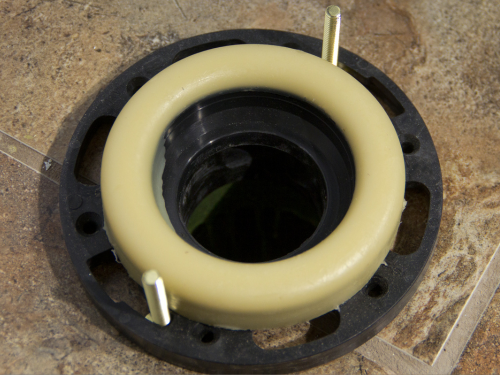
The wax seal under the toilet base can also fail, especially if the toilet is old or was improperly installed, which might cause leaks at the base of the toilet.
DIY Fix:
- Step 1: First, start by removing the toilet. Unscrew the bolts that fasten it to the floor using a wrench, taking care to keep all parts and fasteners in a safe place as they will be needed for reinstallation.
- Step 2: Next, thoroughly scrape off the old wax seal from the bottom of the toilet or the flange on the floor, whichever holds the remnants. Clean the surface well to prepare for the new seal, ensuring no debris remains that could hinder a good seal.
- Step 3: Then, carefully set the toilet back in place, making sure it aligns correctly over the flange. Press down firmly on the toilet to set the new wax ring, which creates a waterproof seal and prevents leaks.
- Step 4: Following placement, bolt the toilet down securely, reconnect the water supply, and apply caulk around the base of the toilet. This not only prevents movement but also blocks any potential paths for odor and water escape.
- Step 5: Finally, flush the toilet several times to ensure there is no leakage. Check around the base and at the connection points for any signs of water to confirm a successful installation.
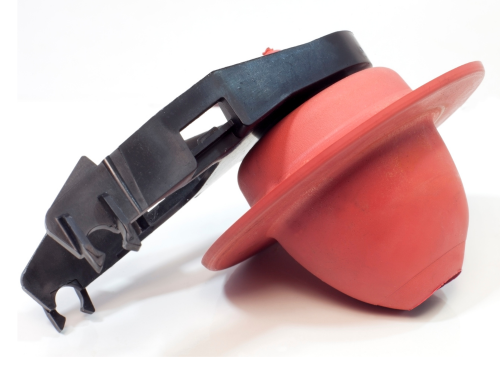
Leak Cause #6: Faulty Fill Valve
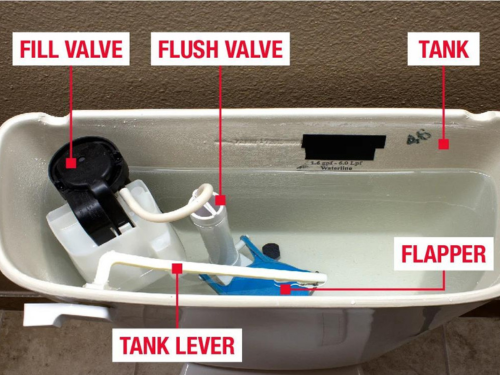
Source: Oatey
An improperly functioning fill valve can cause water to overflow from the tank into the bowl, which can appear as a leak if it’s severe.
DIY Fix:
- Step 1: Initially, turn off the water supply to the toilet to prevent any water flow while you work. Flush the toilet to drain any remaining water from the tank, creating a dry work environment.
- Step 2: Next, remove the old fill valve by loosening the lock nut located under the tank. This nut secures the valve in place, so carefully unscrew it to avoid any damage.
- Step 3: Then, install the new fill valve. Begin by setting the correct height as per the manufacturer’s instructions, which ensures optimal performance. Attach the refill tube securely to avoid any future leaks.
- Step 4: After installing the valve, turn on the water supply to fill the tank. Adjust the float mechanism to make sure the water stops at the proper level, which is crucial for efficient toilet operation and water conservation.
- Step 5: Finally, test the flush several times to ensure everything is functioning correctly. Check around the new fill valve for any signs of leaks. Confirming the absence of leaks verifies that the installation was successful.
Leak Cause #7: Loose Connections (Tank to Bowl)
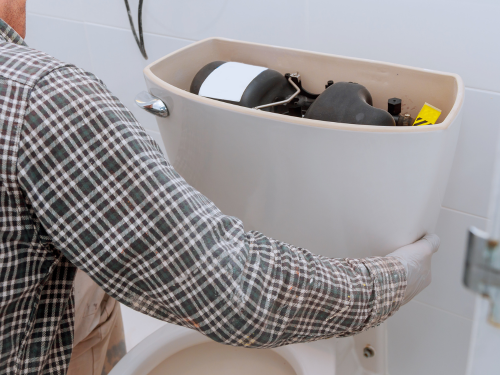
If the gasket that seals the connection between the tank and bowl degrades or the bolts loosen, water may leak from underneath the tank.
DIY Fix:
- Step 1: Initially, tighten the bolts that connect the tank to the bowl. If you discover the bolts are corroded, go ahead and replace them with new ones.
- Step 2: Should tightening the bolts not resolve the leak, first turn off the water supply. Subsequently, drain the tank completely before proceeding to replace the tank-to-bowl gasket.
- Step 3: Upon reassembly, ensure firstly that the bolts are securely tightened. Secondly, check that the tank is perfectly level to prevent any future issues.
Leak Cause #8: Tank to Bowl Gasket Failure
The rubber gasket between the tank and bowl can deteriorate, causing leaks during flushing.
DIY Fix:
- Step 1: Firstly, ensure that all the water is drained from the tank to avoid any spills. Once the tank is empty, carefully disconnect it from the bowl.
- Step 2: Next, remove the old gasket. Inspect the surface for any residues and clean it if necessary before installing the new gasket. This will help create a tight seal and prevent future leaks.
- Step 3: Then, place the tank back on the bowl. Make sure it’s aligned properly before securing it with new bolts. Tighten the bolts evenly to ensure the tank is firmly attached.
- Step 4: Finally, test the installation by flushing the toilet multiple times. Observe for any leaks around the tank and bowl connection. If you notice any water escaping, recheck the bolts and gasket for proper installation.
Conclusion
Don’t let a leaking toilet dampen your day! With these tips, most common toilet leaks can be fixed quickly and cheaply at home with minimal tools required. Regular checks for wear and tear can prevent most issues before they become serious. Remember, if you’re unsure about performing any of these fixes, it’s wise to contact a professional plumber.
Call 1-Tom-Plumber
Don’t hesitate to contact us here or call us at 1-Tom-Plumber (1-866-758-6237) if you need any plumbing, drain cleaning, or excavation service. 1-Tom-Plumber’s certified team of plumbers and drain technicians respond immediately to any emergency plumbing, drain cleaning, or water damage problem. Furthermore, we also handle the excavation of underground water lines and sewer main lines. Our immediate-response team is available every day and night of the year, even on holidays.